If you love Moana or anyone in your house love Moana, then this Moana craft is perfect for you! My youngest loves Moana and loved it when we made this Moana Heart of Te Fiti Painted Rock Craft!
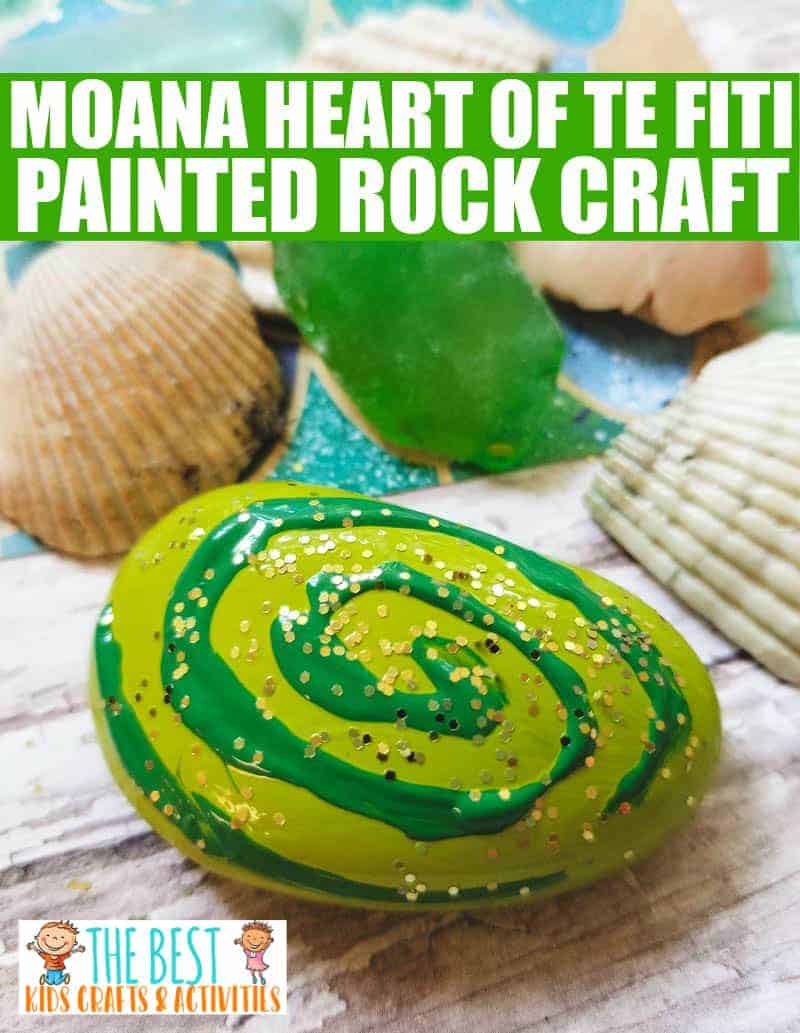
Moana Heart of Te Fiti Painted Rock Craft
Make way for Moana! In Disney’s Moana, we meet a young Polynesian Princess who is trying to reunite a mystical goddess with the Heart of Te Fiti in order to save her village. And while there are many of laughs, songs, and adventures on the way, you can’t walk away from the film without wanting your own Heart of Te Fiti! Look below at how to make your own Heart of Te Fiti Painted Rock Craft, so you can always carry this relic with you as well!
Enjoy Moana with your family, then try creating your own Heart of Te Fiti painted rock. This is a fun way to bring the movie to life right in your own home.
Moana Movie Homeschool Lesson Idea
When doing projects with my kids and homeschooling I love to use movies to get us started. We love movies in general and we love family movie nights, so sometimes we turn it into family movie nights during the day and then add in some crafts to go along with it!
While your rock is drying, talk about the themes in the movie, or better yet take the time to watch the movie, even if you have watched it a million times already. You will see themes of friendship, teamwork, overcoming fears and doubts, etc. Now is the time to talk about these themes and why they are important not just to the film, but in real life. How are you like Moana? How might you be different?
If you are wanting some more fun to go along with watching Moana and doing this Moana craft, these Heart of Te Fiti cookies are super fun to make and eat too!

Heart of Te Fiti Supplies
Here is what you will need to make your own Heart of Te Fiti Rocks
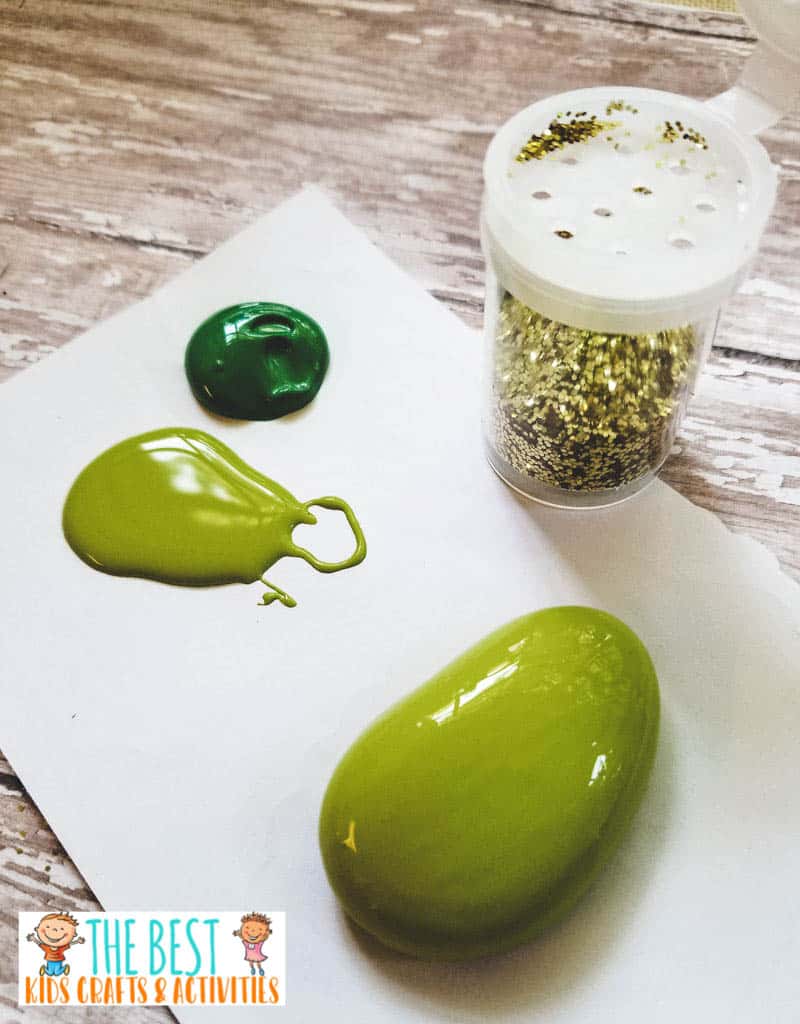
- medium sized smooth rock
- green craft paint
- craft glue
- glitter
How to Make Heart of Te Fiti painted Rocks
Begin by applying two to three coats of the green craft paint to the rock. Make sure the rock is clean before hand so the paint adheres well. Cover the rock completely, both sides of you wish. Allow to dry.
Once the rock is dry, add the swirl on top with your craft glue. A simple circle swirl will do.
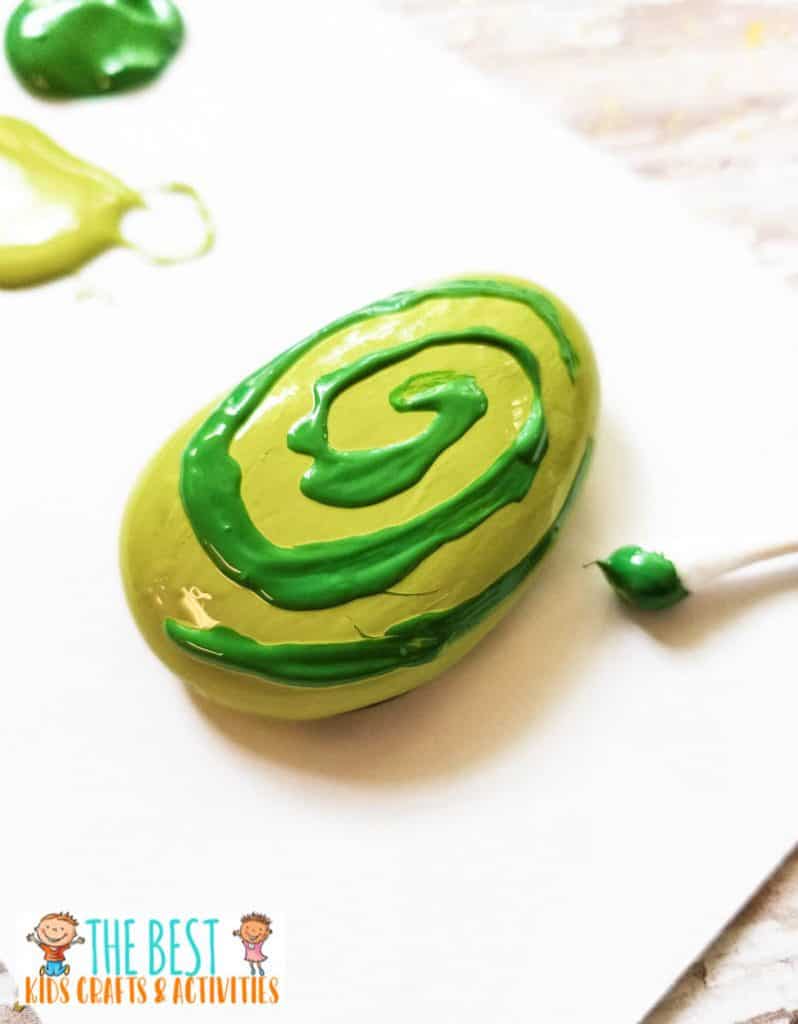
While the swirl is still wet, add a sprinkle of glitter. The color you use is up to you.
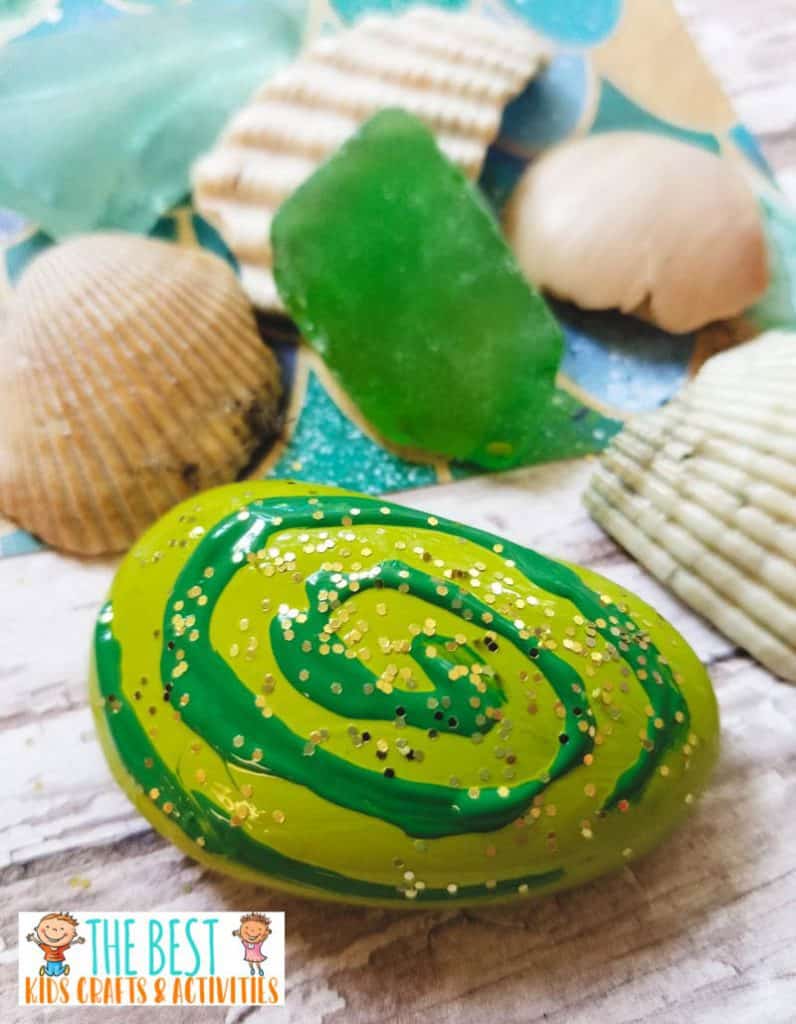
Add the glitter and gently shake off any extra. Allow the glitter and glue to dry well.
3Let the paint dry.
4. Once your rock dries, you can display it! Or, add a magnet strip to turn it into a fridge magnet. You can also use it as a paperweight, or tie it to a string for a necklace.
Looking for more fun activities to do with the kids? Check these out!